Wpforms There Was an Error Connecting to the Remote Key Api Please Try Again Later
Would y'all like to take Authorize.Net payments through your website's forms? With the Authorize.Net addon for WPForms, your users tin make secure credit card payments without leaving your site. Plus, y'all can set up both one-time and recurring subscription payments.
In this tutorial, we'll bear witness you how to install and gear up up the Authorize.Net addon with WPForms.
- Connecting Authorize.Net to Your WordPress Site
- Calculation Authorize.Net Integration to Your Forms
- Setting Upwards Recurring Subscription Payments (Optional)
- Enabling Conditional Logic (Optional)
- Oft Asked Questions
Requirements: You will demand an Elite license to access the Authorize.Net addon.
As well, Qualify.Net requires your site to have SSL (HTTPS) enabled on the page where you're calculation a live payment form, as this allows you to deeply transport credit card data. For setup details, please see WPBeginner's guide to enabling SSL and HTTPS in WordPress.
Earlier yous get started, be sure to install WPForms on your WordPress site. Then yous can go ahead and install and activate the Authorize.Net addon as well.
One time the Authorize.Internet addon is active on your site, you'll need to go to WPForms » Settings in the left menu of your WordPress site. From at that place, click on the Payments tab.
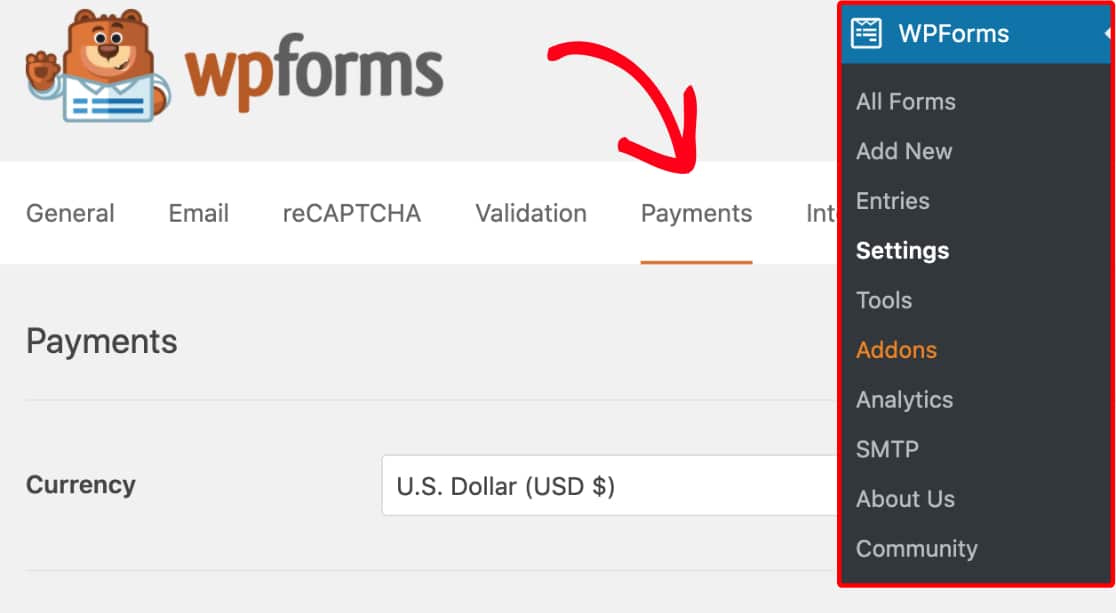
If you'd like to adjust the currency for your payment grade, go ahead and select the option yous demand from the Currency dropdown before proceeding.
Next, scroll to the section labeled Authorize.Net. Here, you'll need to fill out an API Login ID and Transaction Cardinal to connect your site to your Authorize.Net account.
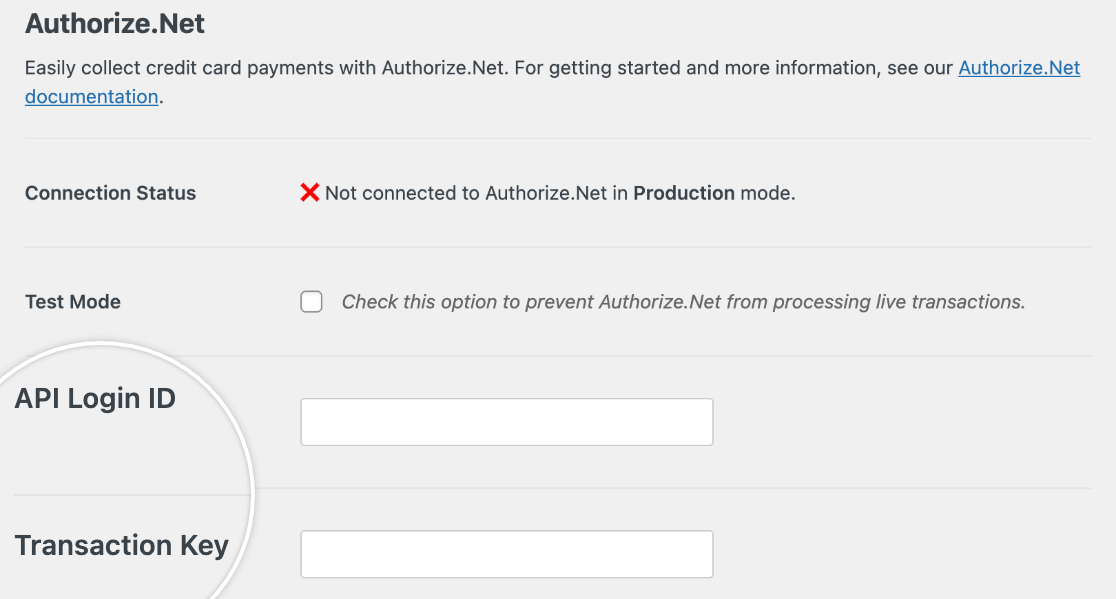
For these settings, y'all'll need to go some details from your Authorize.Net business relationship.
Notation: These credentials are dissimilar for alive and examination transactions. For this tutorial, we'll focus specifically on live transactions. If yous're trying to examination your connection, please see our tutorial on how to exam Authorize.Net payments.
Signing In to Qualify.Net
When you're ready to sign in to your Authorize.Net account, be certain to do and then in a new browser tab or window so y'all can easily switch dorsum and forth between it and your WPForms settings.
If yous don't take an account with Authorize.Internet all the same, go ahead and create one now.
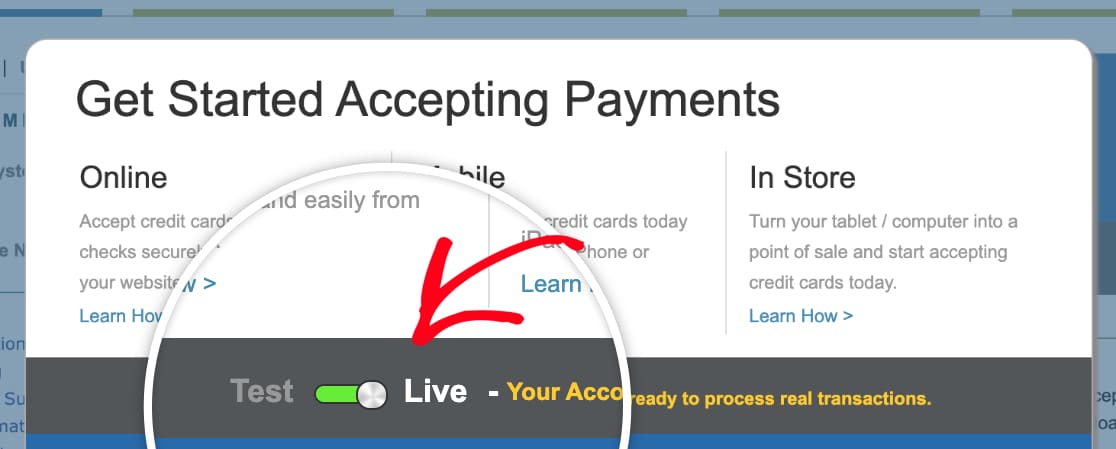
When you log in to your Qualify.Net account, you should meet an overlay showing whether your account is in Test or Alive manner. Be sure this option is set to Live.
Locating Keys in Authorize.Net
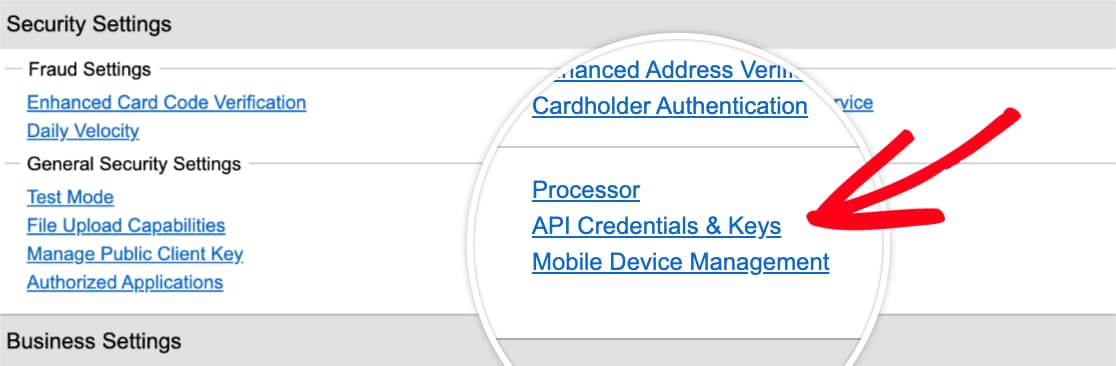
Once yous're logged in and have confirmed that your account is in Alive manner, you'll exist able to get the keys you demand to connect Authorize.Net to WPForms. In the left sidebar of your Authorize.Net account, click on Settings.
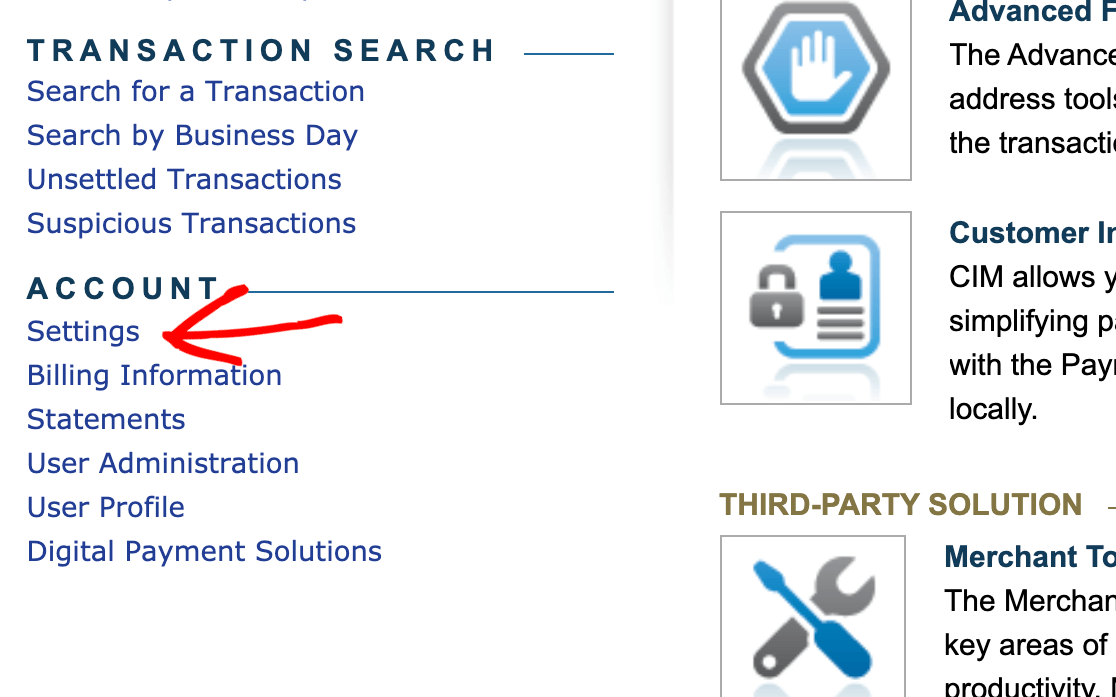
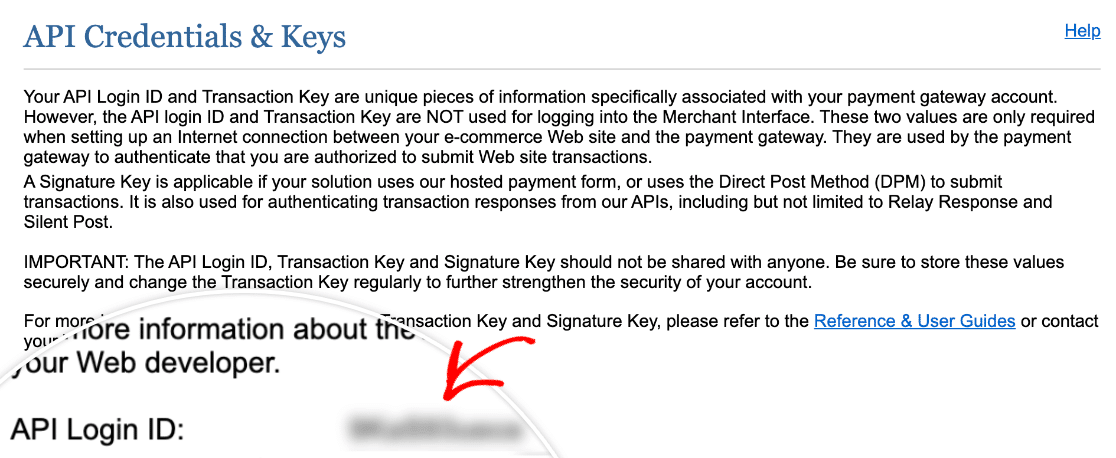
From the Settings page, you'll then demand to click on the option labeled API Credentials & Keys
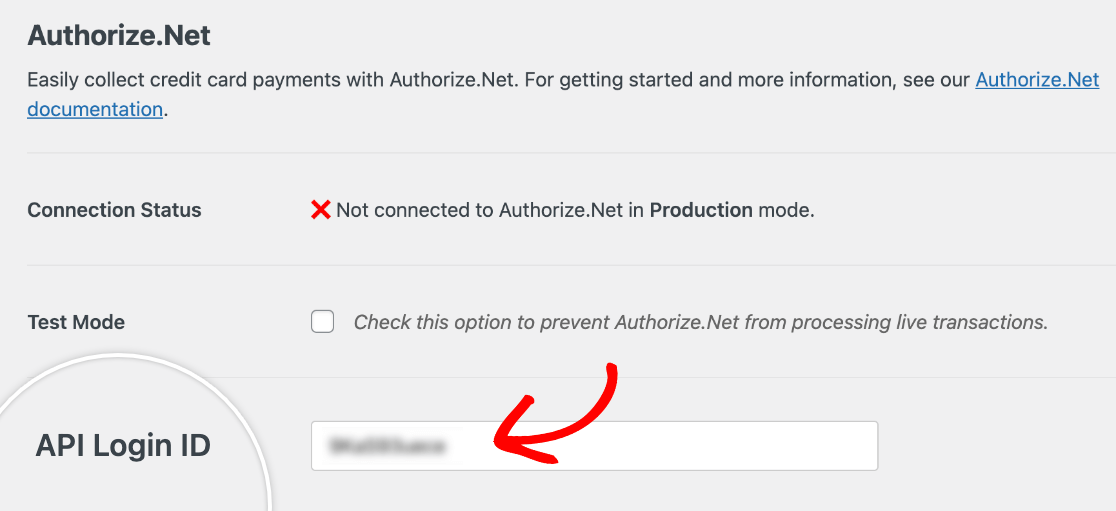
On this folio, yous'll demand to copy the value next to API Login ID.
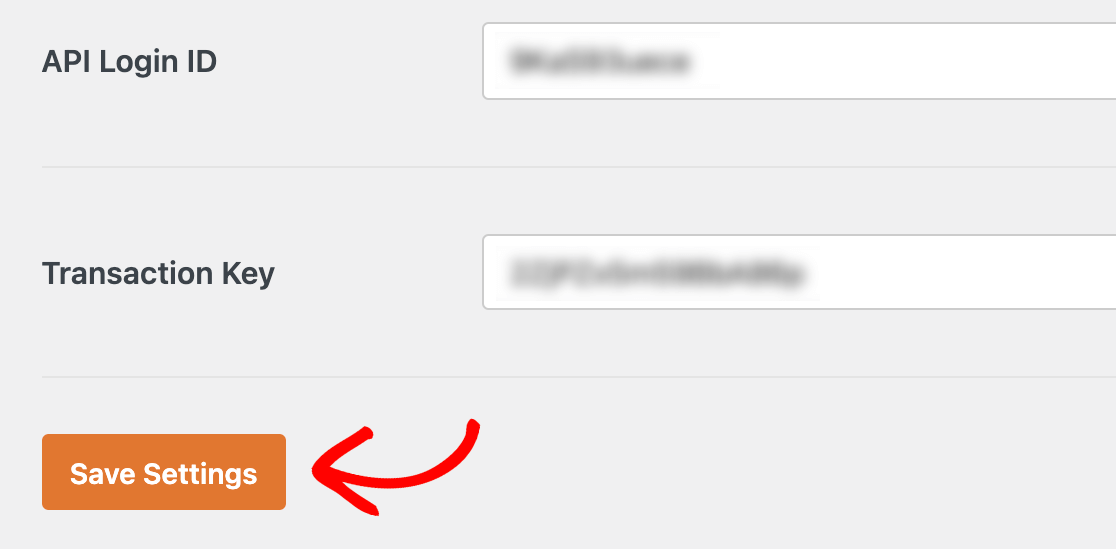
Back in your WPForms Settings, paste this value into the API Login ID field.
Once you've added your API Login ID, you'll demand a Transaction Key.
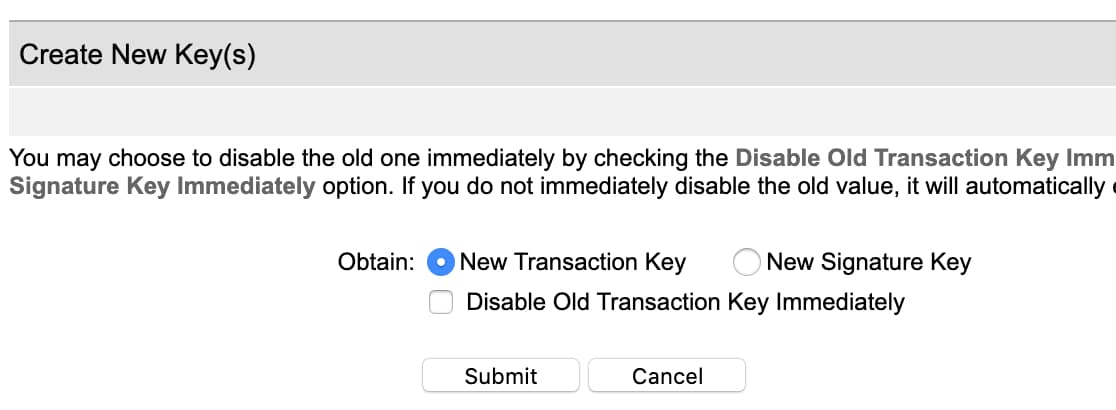
On the API Credentials & Keys page in your Qualify.Internet account, look to the section labeled Create New Key(s).
Annotation: If you accept an existing fundamental, you tin utilise information technology instead of creating a new 1. In this tutorial, we're assuming that y'all haven't set up a Transaction Central earlier or need a make new one.
For the Obtain option here, select New Transaction Key. And so click the Submit button.
Immediately later on submitting, you should run across an overlay request you to verify your identity. Click the Asking Pin push button to kickoff this verification process.
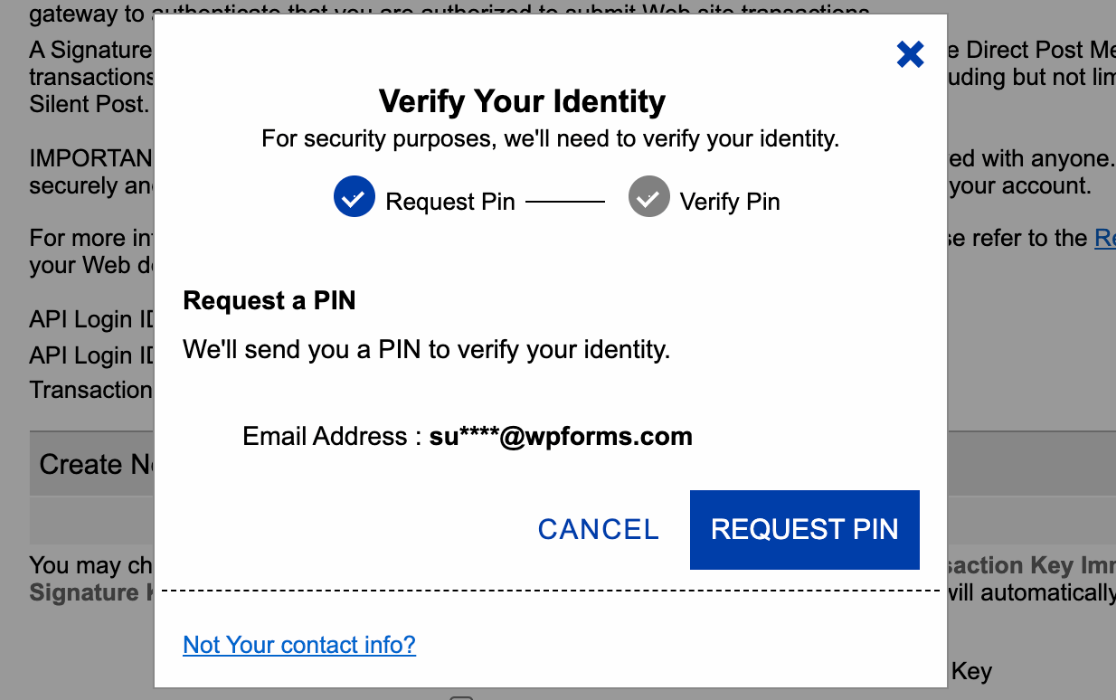
Subsequently submitting the request, you'll be asked to check your e-mail for the Pivot. Enter the code sent to your e-mail, then click the Verify Pivot button.
One time you've verified your identity, Qualify.Net will brandish your Transaction Fundamental. Click theCopy to Clipboard button.
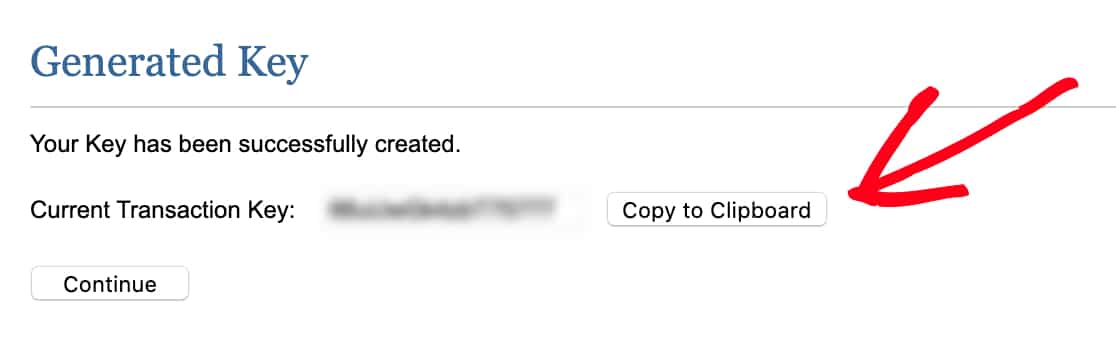
Then flip back over to the tab or window with your WPForms Settings, paste your central into the Transaction Key field, and click Save Settings.
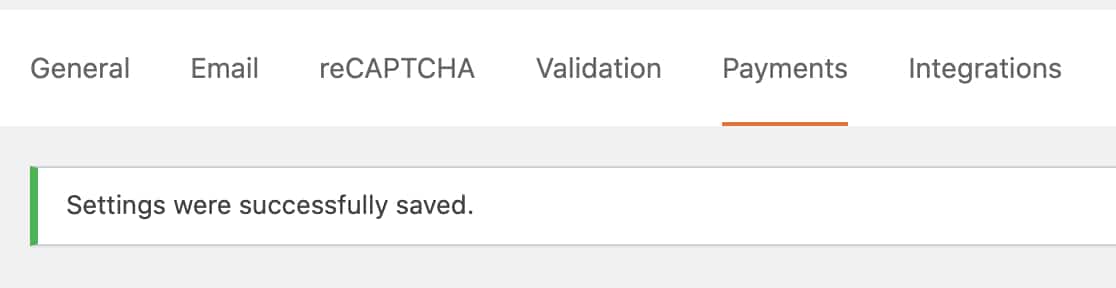
After these settings are stored, you should see a success message at the top of the WPForms Payments page.
Adding Authorize.Net Integration to Your Forms
One time yous've connected Authorize.Cyberspace to your WordPress site, yous can get-go calculation payment functionality to your forms.
Get-go, you'll need to create a new grade or edit an existing 1.
In order for a form to work with Authorize.Net, it must take at least the following four fields:
- Proper noun
- Electronic mail
- A payment items field (Single Detail, Multiple Items, Checkbox Items, or Dropdown Items)
- Authorize.Net (which collects credit carte du jour details)
Annotation: A Full field is non required for Authorize.Cyberspace integration to piece of work. Withal, it'due south helpful for users to easily come across how much they'll be paying.
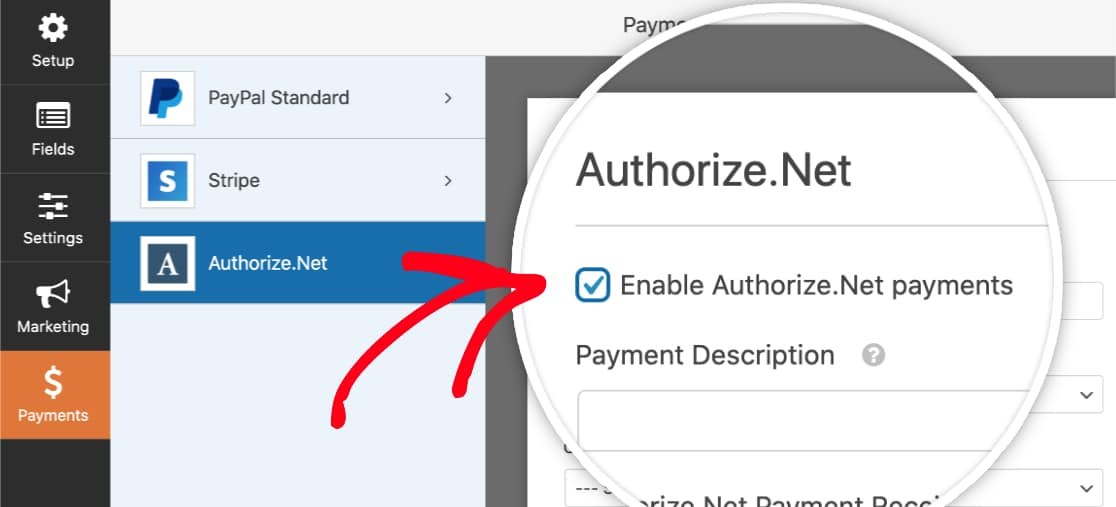
Once yous've added any fields you'd like to include in your form, you'll demand to go to Payments » Authorize.Net. From hither, check the box labeled Enable Qualify.Net payments.
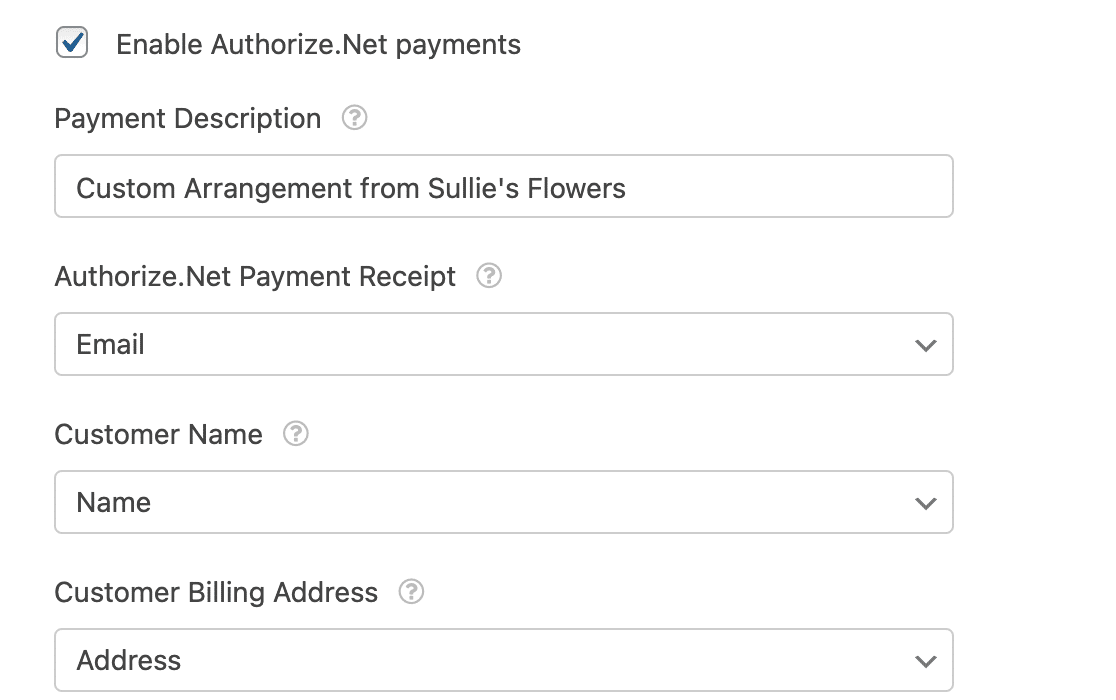
Adjacent, there are a few optional settings you lot can configure:
- Payment Description: This can appear on users' credit carte statements to help them identify transactions from your site. Information technology simply applies to former payments, non recurring subscriptions.
- Qualify.Net Payment Receipt: You can select your form's Electronic mail field from the dropdown to send email receipts to users. While optional, we recommend doing this and so that your customers have directly records of payment. This option likewise only applies to i-time payments, not recurring subscriptions.
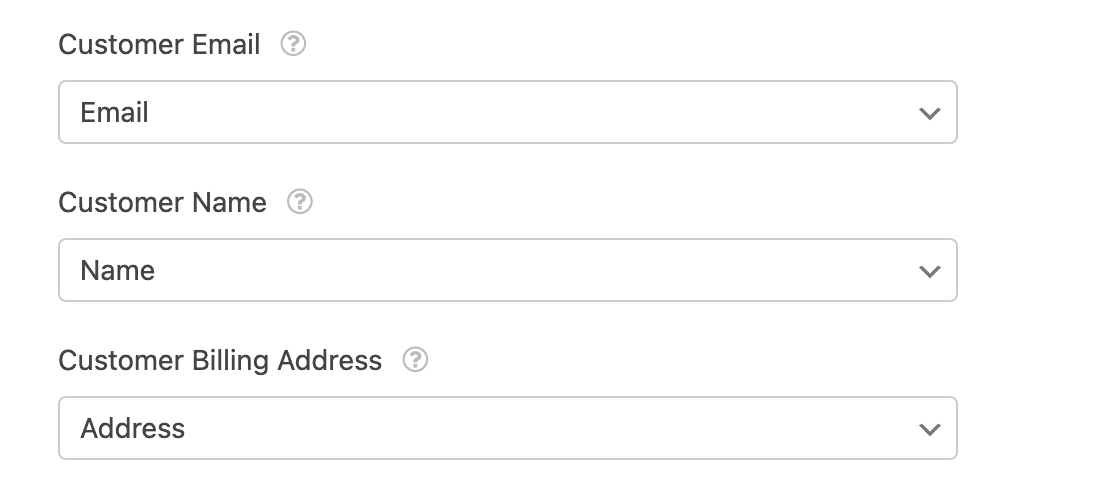
- Customer Name: Utilise this option if yous want to send customers' names to Authorize.Internet with their payment details. Just select your form's Name field from the dropdown.
- Client Billing Address: This selection will transport customers' billing addresses to Authorize.Cyberspace with their payment details. Cull the corresponding Address field from the dropdown.
Afterward you've configured these settings, be sure to save your class.
If you're looking to set i-fourth dimension payments, then you're all set! Only if you want to let users purchase recurring subscriptions, or to add conditional logic for your payments, then exist sure to keep on to the next sections.
Setting Upwards Recurring Subscription Payments (Optional)
Recurring subscription payments volition process one payment right away, and as well process future payments based on the schedule you set.
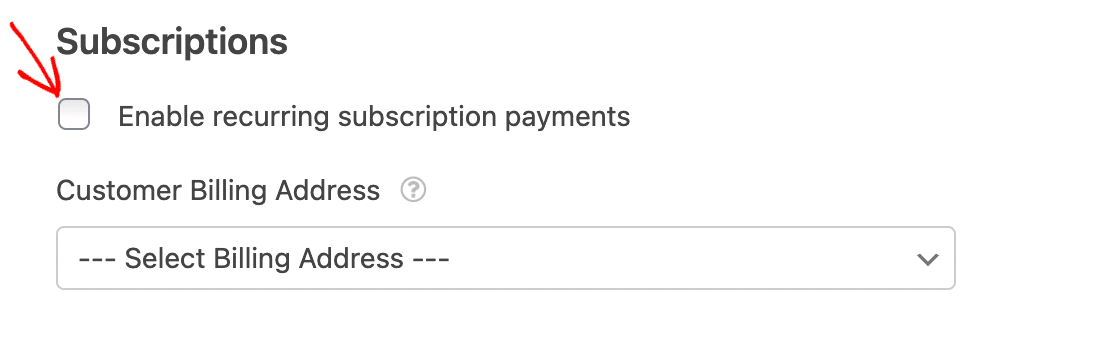
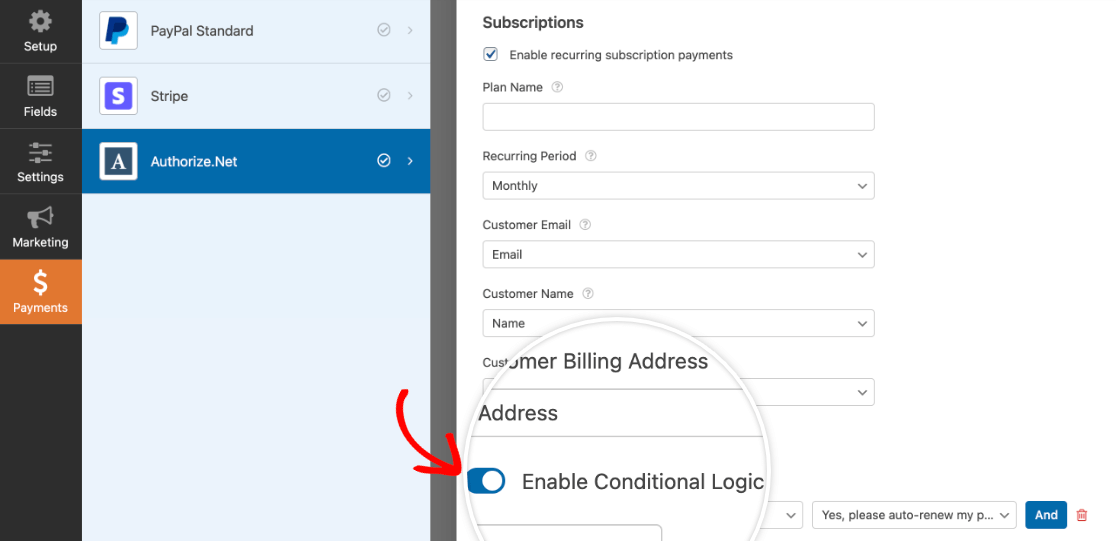
To start setting up a subscription, go toPayments » Authorize.Net in the form builder. Wait for the section labeledSubscriptions and cheque the box toEnable recurring subscription payments.
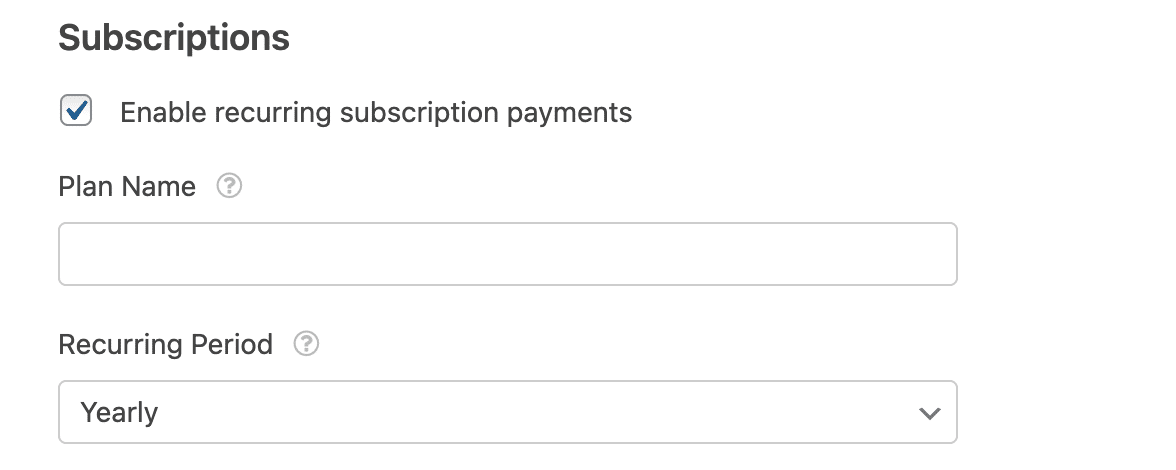
Once you've enabled this choice, additional settings volition appear. First, enter aProgramme Name for your subscription. This can appear on users' credit card statements to aid them identify transactions from your site. If you lot leave this box unchecked, the Plan Name will exist listed as the name of the course.
Y'all will also need to select theRecurring Periodfrom the dropdown to decide the payment schedule for your subscription.
Next, use the dropdowns to select the corresponding fields from your form for theCustomer Electronic mail,Client Proper name, andCustomer Billing Address.
Finally, you lot can choose whether or not you want to enable conditional logic for subscription payments. Nosotros've covered these settings in more detail in the next section.
Enabling Conditional Logic (Optional)
Conditional logic lets y'all create "smart forms" that automatically change certain aspects of your course based on users' input or selections. Beneath, nosotros've covered examples of how to apply this feature for payments too as notifications.
Setting Upwards Provisional Logic for Payments
There are many ways you lot can apply provisional logic with an Qualify.Net payment course. For this tutorial, nosotros'll use an instance of letting users cull whether to submit one-fourth dimension or monthly recurring payments.
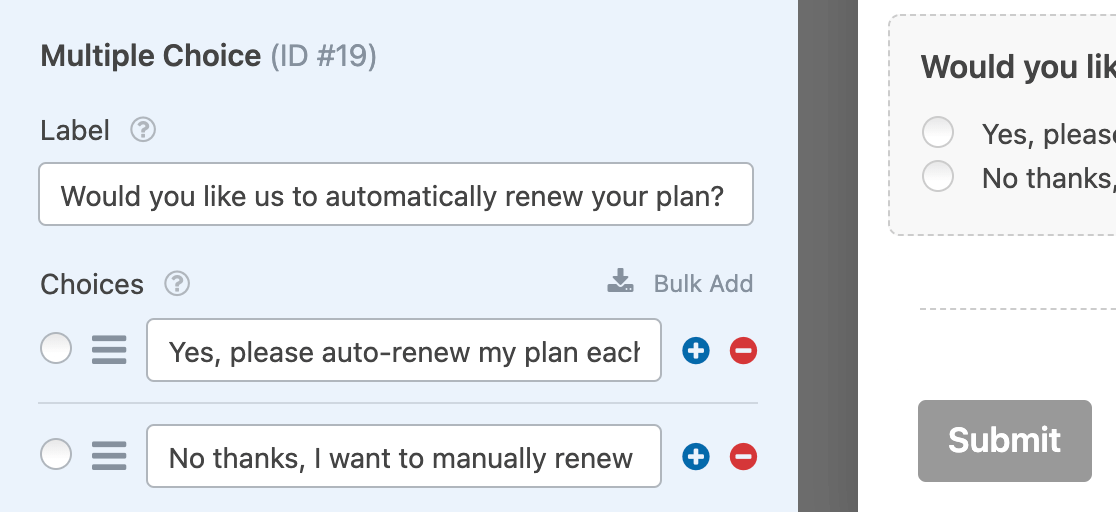
First, nosotros'll add together a selection field to our existing Authorize.Internet payment class. We're using aMultiple Selection field, but a Dropdown field would work, too.
Then we'll edit the field's label and choices to include an selection for one-time payments and an option for recurring subscriptions.
Once your form has all the conditional fields it requires, y'all'll need to set your conditional logic dominion(s). Become to Payments » Authorize.Net and toggle on the Enable Conditional Logic option under the Subscriptions settings.
Note: You lot can also enable conditional logic in the full general Authorize.Net settings. Make sure you toggle on the correct conditional logic option for your course.
For our example, we'll set up our dominion to read, Process payment as recurring if Would you similar the states to automatically renew your programme? is Yep, please car-renew my plan each month.
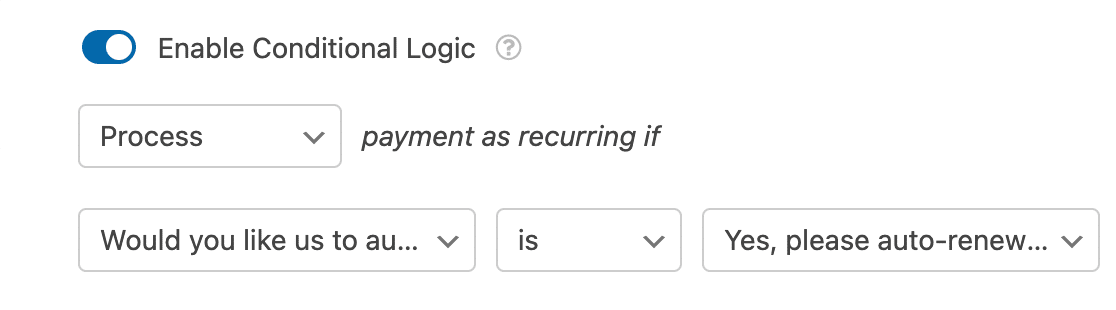
One time this form is published, if users selectYes, please auto-renew my plan each month, then their payment will be processed equally a subscription. If they chooseNo thanks, I desire to manually renew, then their payment will exist processed as a one-fourth dimension purchase.
Notation: Demand aid creating your conditional logic rule? See our tutorial on WPForms conditional logic for more details.
Creating Conditional Notification Emails for Completed Payments
By default, WPForms sends out all notification emails as before long every bit a user submits your course. However, in some cases, you may want to wait to send a notification email until the user'southward payment has been successful in Authorize.Cyberspace.
To delay a notification electronic mail until payment has been successfully completed, go to your grade'southward notifications settings (Settings » Notifications), scroll to the notification you want to delay, and check the Enable for Authorize.Internet completed payments box.

Once y'all've configured all your form's settings, make certain to click the Save button before you lot exit the form builder.

Then you'll be ready to preview and test your form to make sure it's working properly before you lot embed it on your site.
Frequently Asked Questions
Below, we've addressed some of the most common questions we receive nearly the Qualify.Net addon.
What currencies does Authorize.Internet back up?
For the well-nigh up-to-date listing of currencies that Authorize.Net supports, please check out Authorize.Internet's doctor on supported currencies.
Can I send an invoice number to Authorize.Net after forms are submitted?
You can admittedly send invoice numbers to your Authorize.Net business relationship from WPForms. For all the details on how to do this, exist sure to check out our developer documentation for more information.
Why am I seeing an error that reads, "API: (E00027) The transaction was unsuccessful"?
This trouble is likely caused by required fields in your Authorize.Internet account that users are not filling out in your grade. This could exist considering there is no respective field in your course for this information, or because you accept non marked the field as required and users are skipping over it.
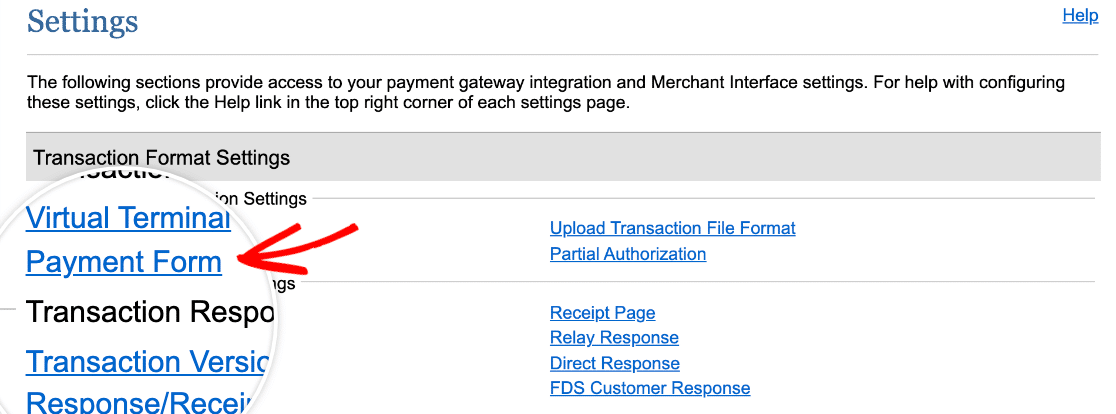
To see the required fields for your Authorize.Internet account, log in to your dashboard and go toAccount » Settings in the left sidebar carte du jour. Then look forTransaction Format Settings and click on Payment Form.
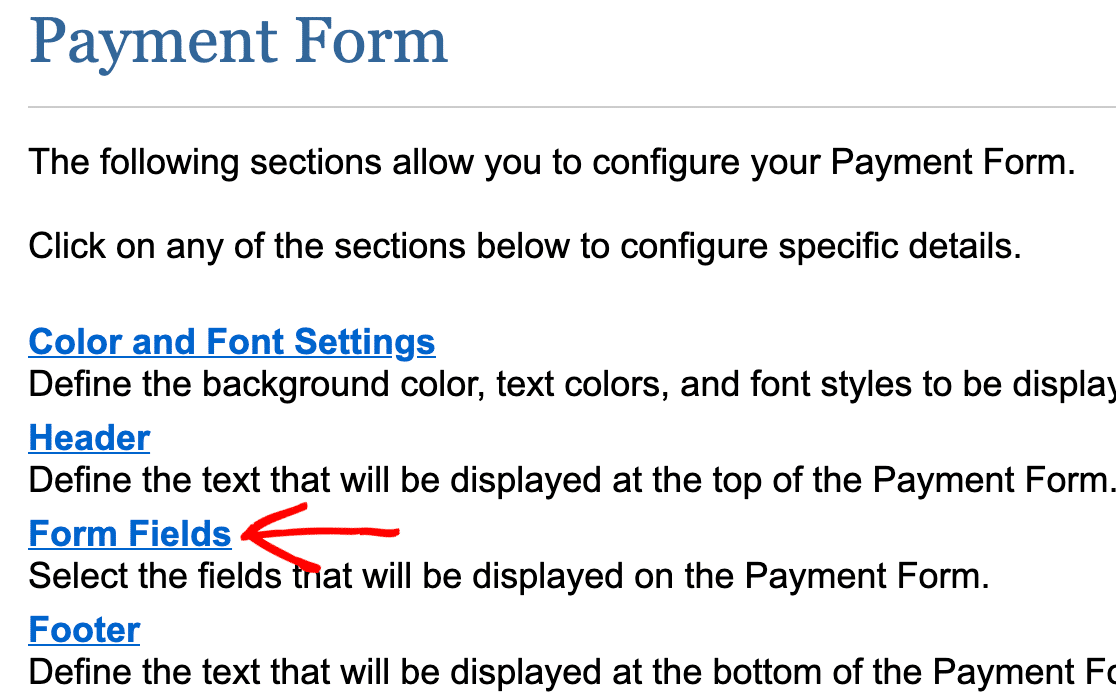
On the next screen, click Grade Fields.
Here, you'll see a list of all the available payment fields for Authorize.Cyberspace. Required fields will have a cheque in theRequired column.
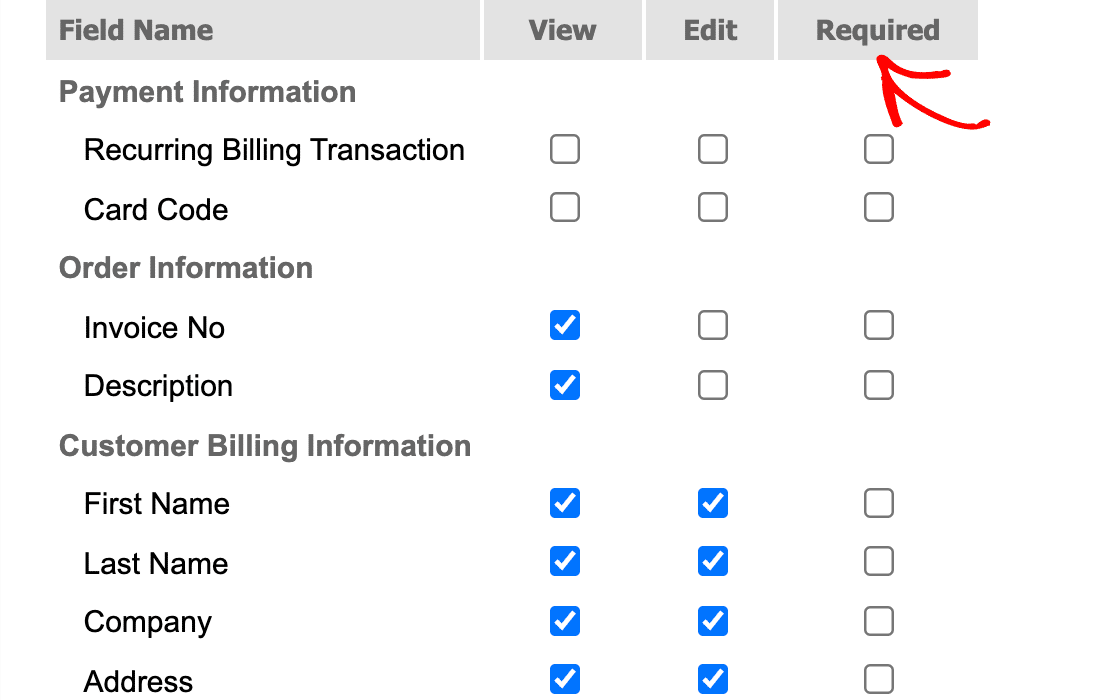
If there are any fields here that you do not want to crave for customers, you lot can uncheck them and save your settings past clicking theSubmit button at the bottom of the screen. Otherwise, make sure y'all have the proper corresponding fields in your form, that they're mapped to your Qualify.Net account, and that you lot've marked them every bit required in the Field Options panel.
For more than help with this error, please contact Authorize.Internet's support team.
That'due south information technology! You tin now gear up Authorize.Cyberspace payments with WPForms.
Now that y'all know how to prepare an order form, would you similar to learn more than about how your entries will look and work? Be sure to check out our complete guide to form entries for all of the details.
Source: https://wpforms.com/docs/how-to-install-and-use-the-authorize-net-addon-with-wpforms/
0 Response to "Wpforms There Was an Error Connecting to the Remote Key Api Please Try Again Later"
Post a Comment